Tuesday, January 30, 2018

Glamorous Art Deco


Here today with a Tribe post for Gwen Lafleur.
I must tell you,when I get on a run with something,it seems there is no stopping me! heehee as there are many more projects filling my art desk right now with Gwen's Art Deco line of stencils leading the way...thanks Gwen for the inspiration!
So,let me tell you a bit about this piece as you look at the photos... 
(sorry no step outs)


Gorgeous, glorious coloring-eh?
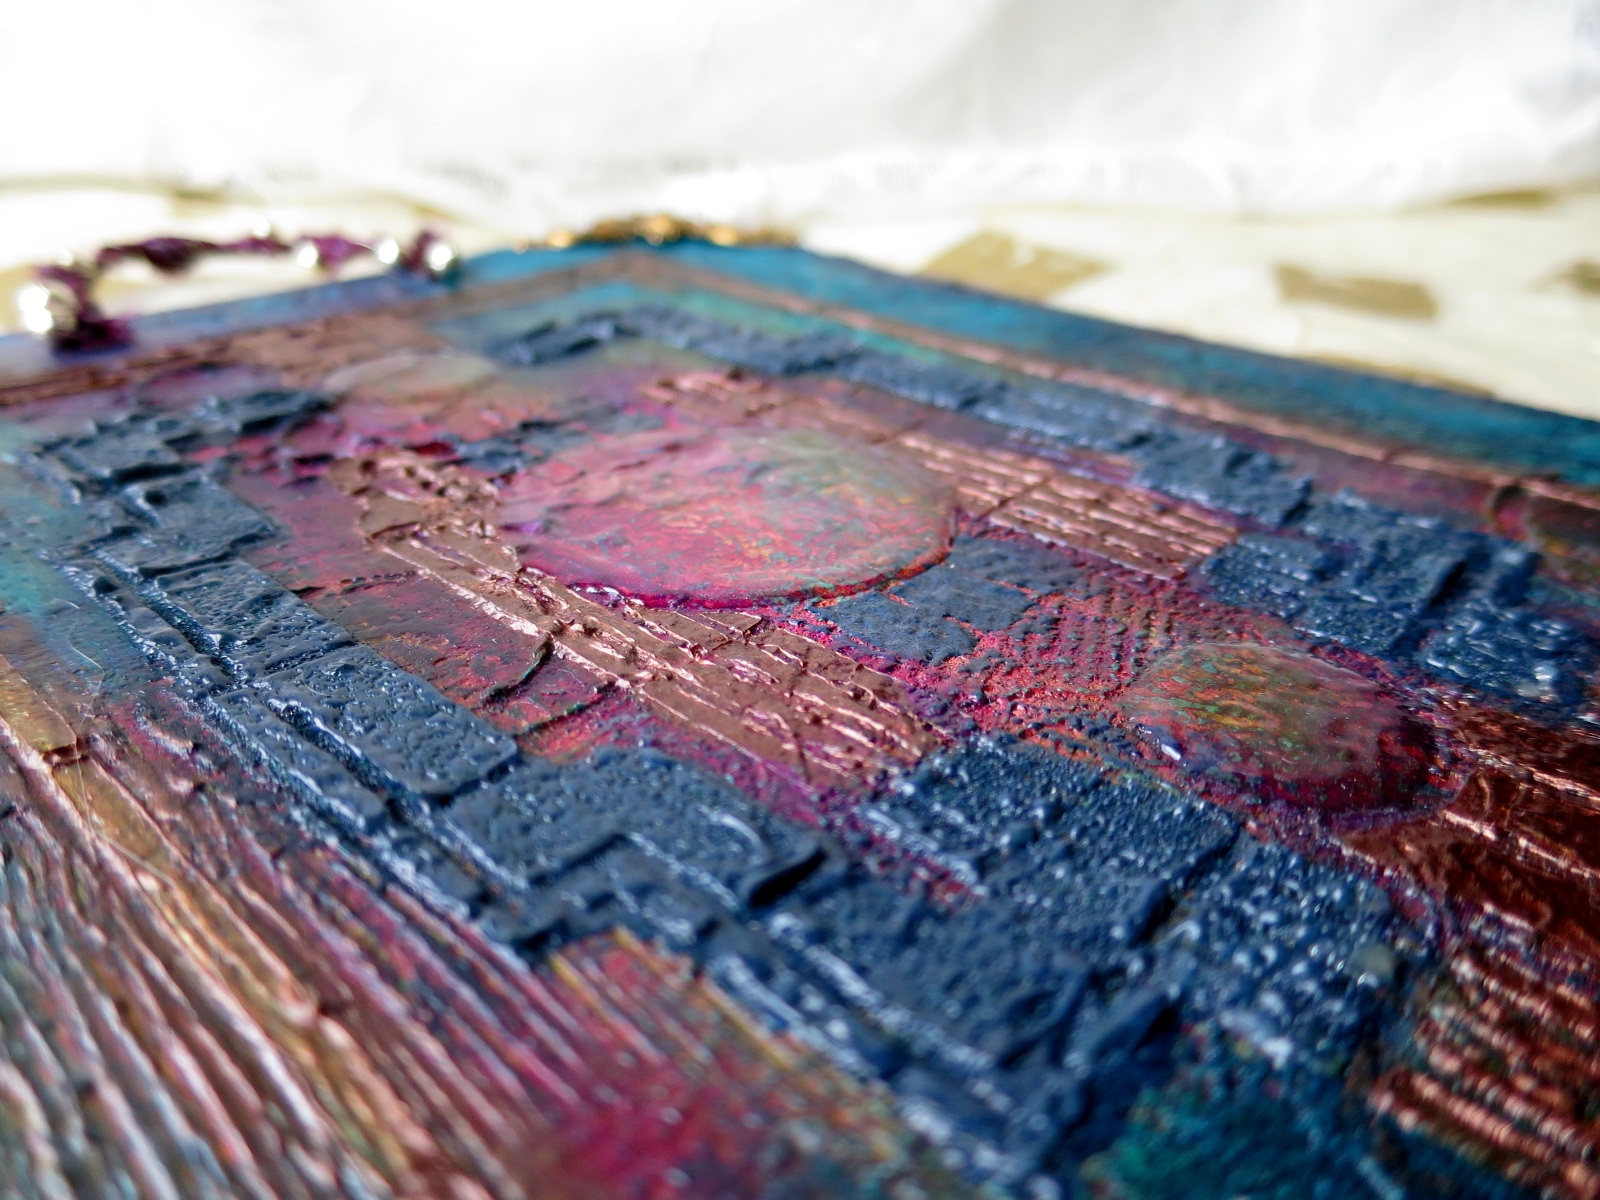
and how about those yummy,scrumptious, textures?
Modeling paste,embossing paste, #EmeraldCreek #BakedTexture  embossing powder-Oh MY!


It all started with this canvas that had some background marks on it and then was put away;because my mind wandered elsewhere. The colors were built up gradually...before Gwen's Deco stencils came into play.


links for colors at the end of post


I just love the richness of the colors and textures of this piece. a bit Bohemian I think


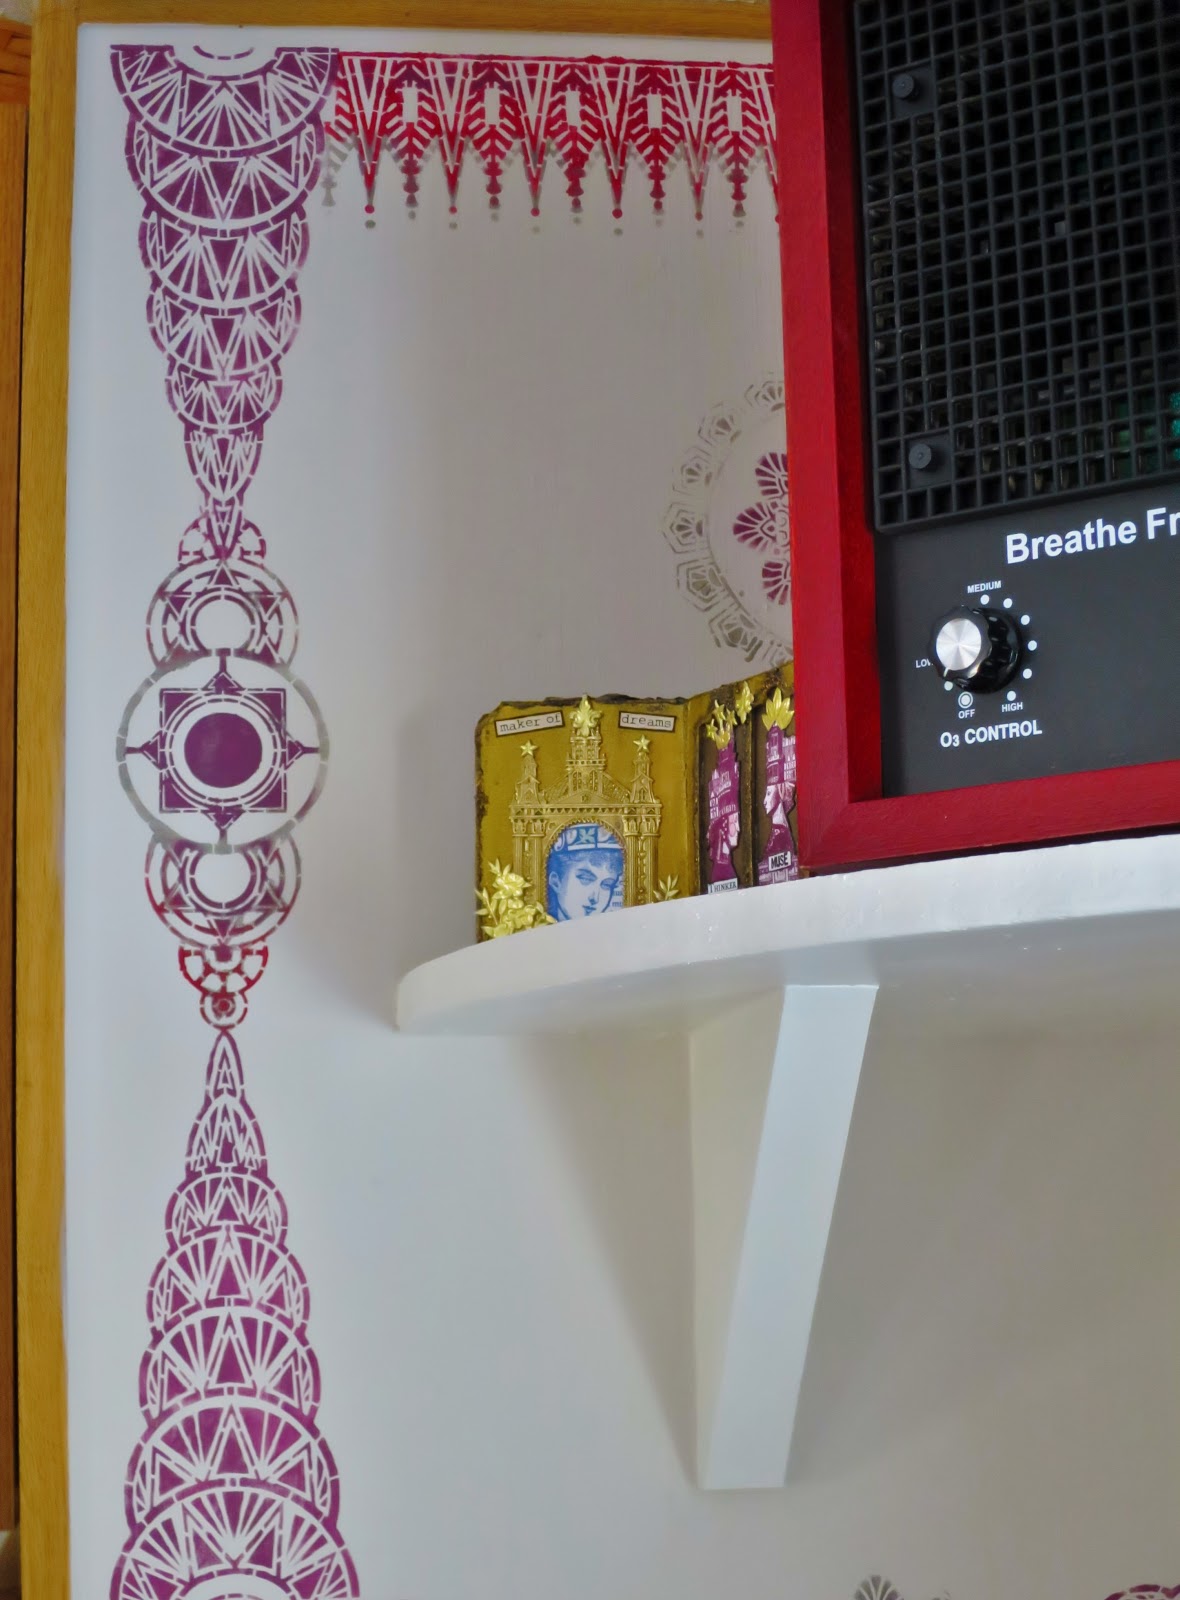
to the right you see markings of another stencil of Gwen's Art Deco line- Art Deco Sunburst Background


The main stencil here is Gwen's Art Deco Bookplates.
The layers went sort of like this...
paint-let dry
thin layer of modeling paste-let dry
paint-let dry
embossing ink and Seth Apter's new Deep Sea #BakedTexture embossing powder,set with heat tool
At this point I wanted more depth,so....
to the inside of the Book Plate,I added a thick coat of clear embossing paste- let dry slightly
next added more of Seth's Deep Sea embossing powder.
Here I took the heat tool and from a distance,slowly let the powder #Bake into the paste-this was a glorious scene to watch!(and yes,this part took forever but was so worth it in my opinion)
You can see the difference in the embossing paste and ink here with the #BakedTexture .

 The  Deep Sea around the inner circle was with ink alone and the outer design with embossing paste.
 I was loving the stencil design's circles of coloring so much I decided to keep as is,by applying a few layers of Glossy Accents.

  How yummy are those textures??
I rubbed some of the Silks Acrylic glazes over the raised areas, again,more is more as we texture,color junkies like to say!
After all the colors and textures were dry and set, I added the final embellishments.
Gold antique findings I have had in my stash for years,finally found their place.


just in time for this piece...
Gwen added these GORGEOUS  Irresistible India Sari Scraps to her shop ! 
When my order came in the post,I was blown away and knew this purple scrap had to go on my canvas!


I also used another piece of the purple Sari Scrap that I tore and wrapped the this fabulous Gold Beaded Wire to use as the hanger as well as top off the Sari.


and now the view of the finished hanging


 I am absolutely thrilled with how this turned out-I do believe this is my favorite piece I've made! ")


 Thank you so very much for joining me today - I hope you found something here that sparks your creativity or inspires your muse!
 peace & love
Jackie ")


Just a bit of FYI about Art Deco...
taken from Wikipedia
Art Deco,sometimes referred to as Deco,is a style of visual arts,architecture and design that first appeared in France just before World War I. During its heyday,Art Deco represented luxury,glamour,exuberance.It took its name,short for Arts Décoratifs, from the Exposition Internationale des Arts Décoratifs et Industriels Modernes (International Exhibition of Modern Decorative and Industrial Arts) held in Paris in 1925.It combined modernist styles with fine craftsmanship and rich materials.Art Deco was a pastiche(an artistic work in a style that imitates that of another work,artist,or period of many different styles)sometimes contradictory,united by a desire to be modern. It featured rare and expensive materials, such as ebony and ivory, and exquisite craftsmanship.

Products

 Gwen Lafleur's shop products:

Baked Texture Embossing Powder-Deep Sea
Art Deco Background Stencil and Art Deco Bookplates Stencil
Irresistible India Sari Scraps- purple
Gold Beaded Wire by the yard


Other Products used:
DecoArt Media Fluid Acrylics~
Transparent Yellow Iron Oxide,Cobalt Turquoise Hue,Cobalt Teal Hue,Dairylide Yellow, Raw Sienna, Payne'sGrey,PhthaloBlue,Quinachridone Magenta,Quinachridone Gold

Wendy Vecchi Translucent Embossing Paste

Colourarte Silks Acrylic Glazes~
Honey Amber,Golden Monarch,Teal Zircon,Jazmin

 Felt
Vintage embossing gold findings
8x10 Canvas panel
E6000 Glue

Find out more about Seth Apter and his new lines(click link)

Learn more about  Emerald Creek  and their products(click link)


Joining in on these challenges:

Mixed Media Monthly Challenge #44 - "Ring in the New" 

Using new embossing powders from Seth Apter #BakedTexture

  More Mixed Media Challenge - "Anything Goes" optional Blue


Wednesday, January 17, 2018

redecorating with Gwen


Gorgeous designs...right??


 these fabulous ArtDeco Stencils were designed by Gwen Lafleur for StencilGirl products.
I asked Riley to build me a shelf to get the purifier up and out of the way and we decided it would be best in this corner

and seeing how we were redesigning our home...
 I felt it was time to add a bit of bohemian,groovyness to our Mid Century Style.
and while playing with my Gwen Stencils,
 I said,WOW! Wouldn't these look soooo cool in the kitchen?


 This might be hard to tell from here but I wanted the colors to kind of flow with my lamp that is in the livingroom,as our floor plan is open.

 And these were my instruments of choice!
Gwen's stencils from her
(which I cut into thirds to be able to stencil easier with)
 
also used were
Chalky Finish~Primitive,Victorian
Americana~Neutral Grey
MultiSurface Satin~Dark Scarlet
and just because I have really fallen in love with Gwen's Art Deco Borders stencil, I sat down the other night and created this art journal page in my journal Gwen gave me for Christmas.
As well as the Art Deco Borders stencil I also used some of the Chiyogami Paper from the Japanese Paper Sampler~Chiyogami Buffet Pack,also available in Gwen's online store.
 I found this awesome quote by Diane Keaton and well,it sums me up to who I am today!


Thanks so much for your visit!
 Again, I have to tell you how much it makes my day to read your lovely comments!
peace&love
Jackie ")


Monday, January 15, 2018

Different sort of artwork-feeling inspired


Today's post is full of photos..I mean FULL! 
Just a head's up so you have a full cup~
  This is a picture story of inspiration...
and it all started here in this beautiful Mid Century house in the woods in Port Orchard,Washington.


I wrote months back about making and taking a gift to my son's home for a house warming present.
This is the post here  and this is the gift hanging in Len's great room

Len had called me and asked if Riley and I would come visit and help him in his new home with the many projects he had underway. Len and his friend tore up the whole kitchen down to the bones and after accessing what needed to be done it,began insulating, wiring, plumbing,adding new windows and skylights,and adding all new drywall and shoring up the floor joists, PHEW!!
 He asked for my help with the mudding and finishing of the drywall. He knew his mom is a perfectionist like himself as he watched me remodel three homes while growing up.
Of course we would come! So off we went,Len flew us out to the beautiful Port Orchard,for 10 days.
While there and working from sun up past sun down, my husband Riley and I had no idea the thoughts that were taking shape in our brains about our own place-heehee


Lenny and I being silly-we were getting a bit punchy after awhile!


Riley was very good at showing me spots I missed!

While there, Len's furnace died, and then the pellet stove kicked the bucket.All part of being a new home owner we kept saying to lift his spirits!
I am thrilled to tell you,that after researching through the net, Len found his furnace(from the 70's) and it's manual online. He managed to trouble shoot, and send out for new parts and after he installed a new motherboard, It worked like it was brand new!
 My boy is a genius! not too proud,huh?
Len has already replaced this stove with a new one

Riley helped out with the mudding, I did the finishing and sanding and we were able to get two coats of paint up.
 Of course,organizing mom did her best to keep everything as clean and easy to get around as possible and found great crock pot recipes to make to ease the burden of a semi functional kitchen.
yea, a bit of decorating as well, I set Len up a tea stand by the stove. He makes the best apple chai tea!


this was one of the most essential things to be worked and we were more than thrilled when it was completed.
 When Len was taken down old walls and drywall, he uncovered this. Yup, this is what was holding up the main support beam and was covered with drywall. It was only a matter of time before that 2x2 completed splitting and the 6x6 gave under the weight of the ceiling.


Len and Riley installed a temporary post, cut out the old beam,did more shoring up of the floor and put in the new post! Yay!!

Next we were on to building the kitchen cabinets that Len had designed.
Had any of us ever built cabinets from scratch? 
yea- NO! 
But I told you my son is a genius!


yup, that's me in jammies painting in the trim of the cabinets...I did this while the guys were cutting and assembling


The first cabinet was done and next came adding the sink and plumbing.
 Riley again,pointing out what needed to be done! heehee-such a card!

So while the two of them did the plumbing, I found some time to make a bit of art.
Notice the mood lighting to the right? Len built that light and installed from his computer a blend of changing colors I had picked out to give me some "mood" while I was creating.
I claimed this spot here as my own while we were there.


 they worked while I played,and before you knew it
  we had running hot and cold water and a kitchen sink!!

No more doing dishes in the bathroom sink for me! Woo hoo!! heehee
That was about all we were able to get accomplished while there, as well as a hundred of other things,and I know Len was so very,very happy that we were able to come out!
Since we left,Len is continuing to work on his cabinets and has started the staining as well as building more
My son is amazing and a genius! just saying...


Well now we are home and my husband keeps talking about how our carpet is gross,which I know already! and one morning I come in out of my studio to find him cutting strips of the carpet out! "No time like the present" he says!

After searching for a couple of weeks, mind you this is 2 weeks before Christmas, we find this gorgeous hardwood flooring and the two of us installed it.
Chum did his best to put up with the inconvenience...
And it is done!
By the way, this is our Christmas tree this year-minimal decorations due to remodeling


 we could have stopped there, but...

 I saw this fabulous cabinet on Pinterest
and before you knew it


  we designed our own to fit our space!

might as well paint the moulding as well!
 Now,this brings us all the way back to the photo at the top.

I have a gorgeous collection of vintage as well as current pottery.

This has been hidden away in the other room since we moved as I had no real place to show it.

Besides my beloved Raku pieces, there are  Glidden, original McCoy, some Brush,  Van Briggle, Amano~made in Germany, and Royal Hickman.


and yes, even some of my artwork


As you can see,our style is vintage. We love Mid Century Modern, and we think we did a pretty good job turning our modest single wide into a lovely work of art!(in progress)
Len's home and "Modern" look gave us the inspiration to update our home,but are we done? not yet! Stay tuned for more!

Be sure to come back on Wednesday so you can see how I have brought Gwen Lafleur's style into our home as well!
If you made it all the way here- I applaud you! You are the best!
peace&love
Jackie ")