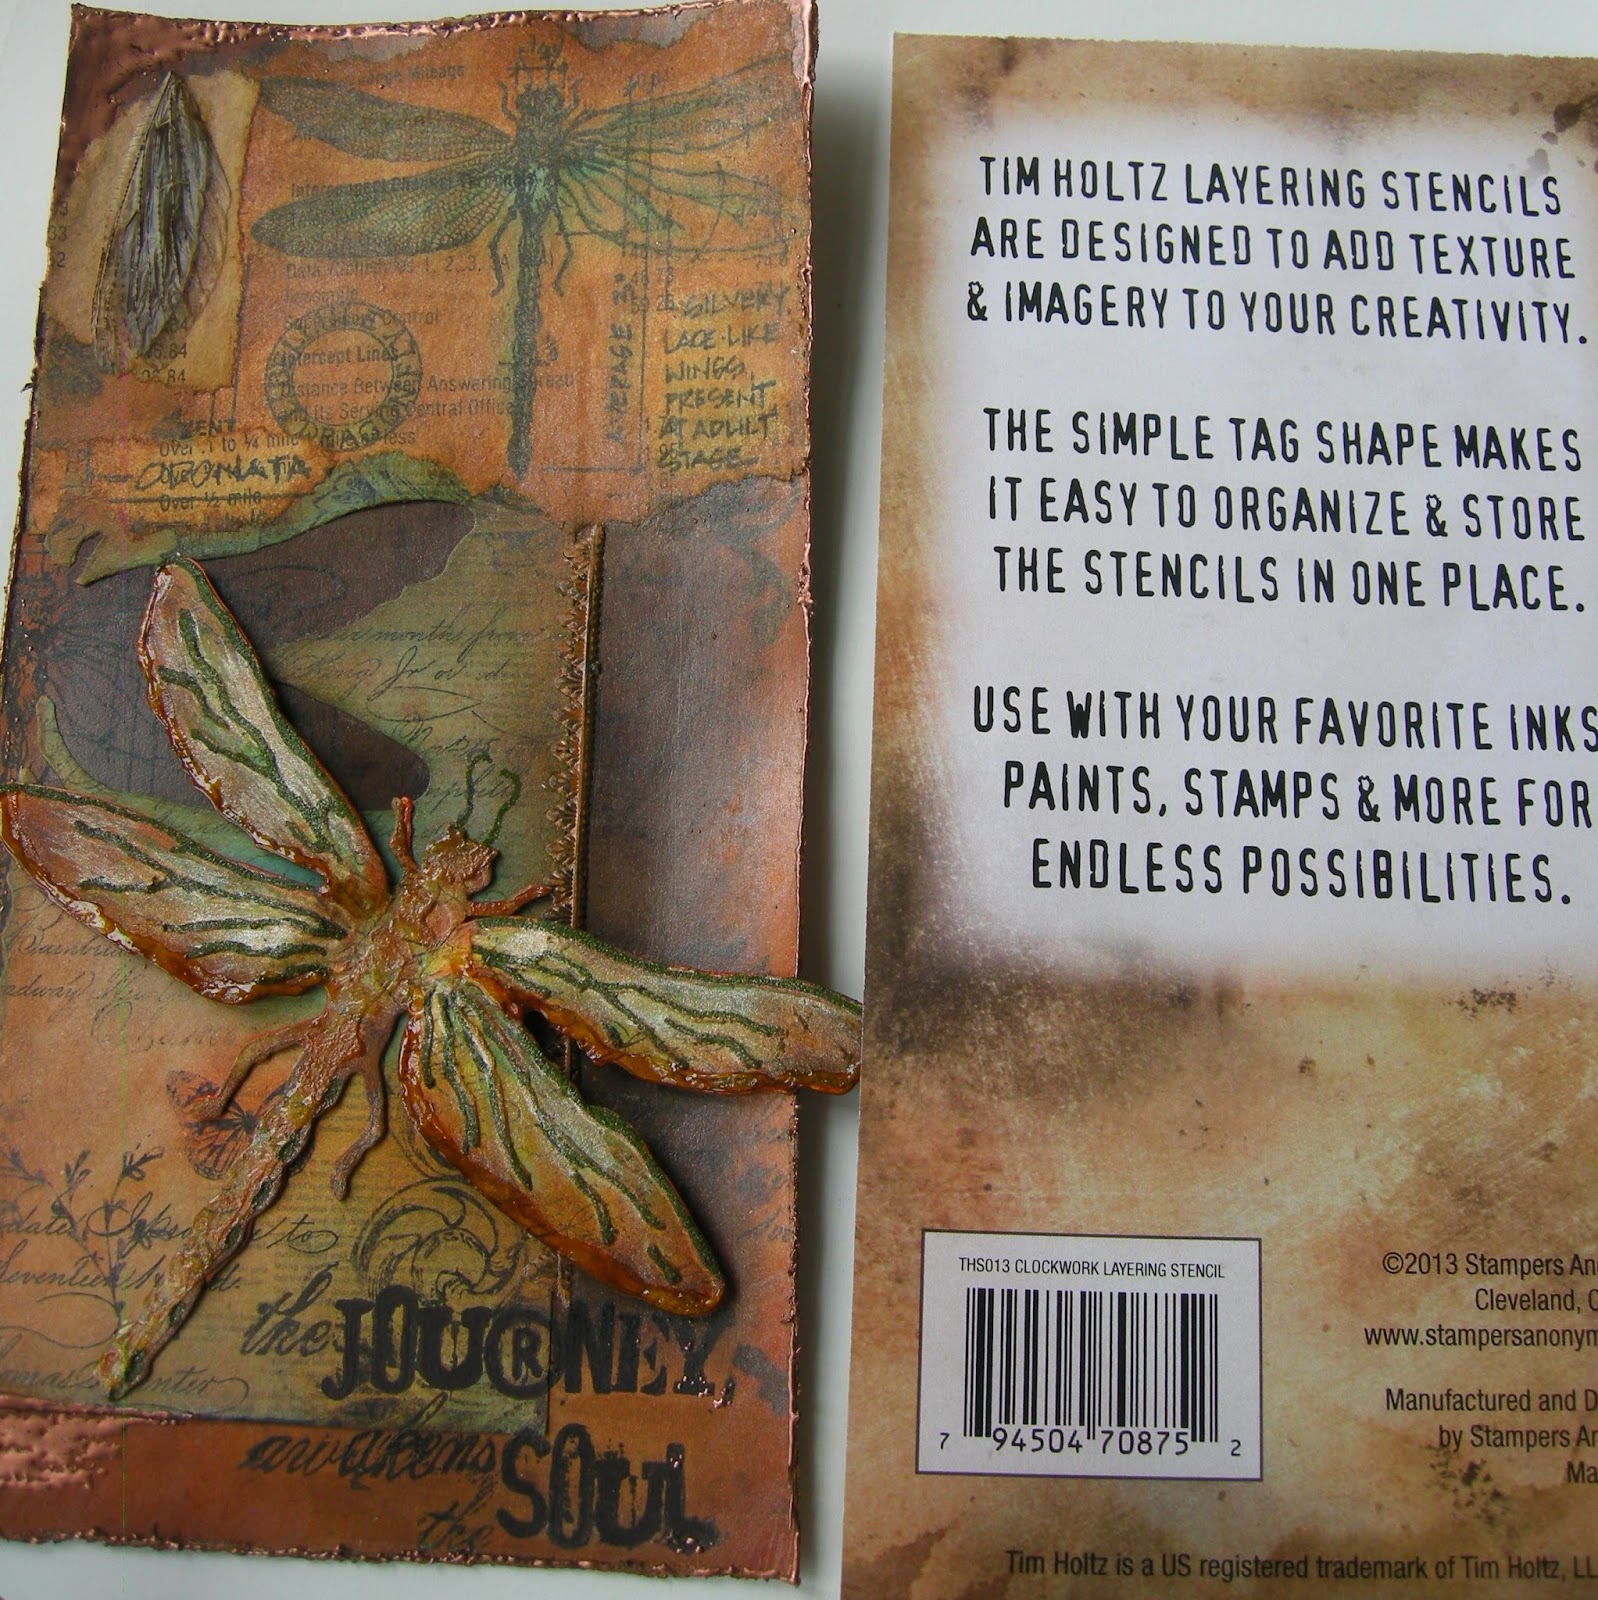
the Journey awakens the Soul...

The Vintage Journey's Blog challenge for July is for using Dies and Distressing- in the Tim Holtz influence.
Since I dig Tim Holtz, I love distressing and I just got my first die! I thought I would play along!.
The main requirement of any of Vintage Journey's challenges is that your piece is Tim Holtz inspired.
Let's get to it...
For my substrate, I used the thin card that comes inside of the Tim Holtz Layering Stencils- I used this because it really had a nice pattern on it and if you know me, I love to re-use, recycle, upcycle, ect!
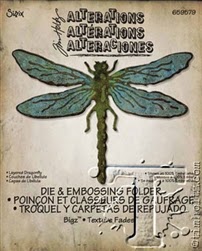
 My main ingredients used were Tim's-Sizzix-Alterations Die&Embossing Folder~Layered Dragonfly , and Ranger/Tim Holtz -Stampers Anonmynous~Classics #1.
Other products used are listed below
To begin,I stamped vintage text across the card paper as well as added a few scrolls (which are now covered)
For the die, I cut the dragonfly from a patterned paper and then ran it through the embosser.
 On the left hand side of my card,I stamped the Classic's#1 Odonata~Dragonfly,stamping it off the page,only using the right side of it.
Next, I placed the right side of the cut paper over the stamped image and glued it in place.
(I really wish I taken in process photos!! Battery was dead! ARGH!)

Again,using the same dragonfly stamp, I stamped the whole image on a vintage piece of newspaper- then colored it in with distress markers. Gently, I tore off the edges and glued down most of the main image as well as the word -ODONATA
(from the stamp- which is the scientific name for Dragonflies)

 For the previously die-cut dragonfly, I colored it, using Distress Markers. After that I added Distressed Embossing Powder~Peeled Paint,to the veins of the dragonfly,as well as for the antenna.
For the distressing with inks, I used the Broken China toward the center of my subjects and the Rusty Hinge and Vintage Photo toward the edges.
In the next photo,here,I added a bit of Glossy Accents to the wing's edges and also used it to adhere the "found wing" at the top of my substrate.
disclaimer-(No insects were hurt during this creation- the wing was found in Nature) ")
 Around the edges of the card, I first distressed them using Ranger/Tim Holtz'z Distressing tool.Then, I edged with Antique Bronze before I used the Ultra Thick Embossing Enamel in Bronze to give a bit more of a finished look.
 And finally I stamped Tim Holtz' stamp~
"The Journey Awakens the Soul" on the right hand bottom corner.


Stampers Anonymous Classics#1

Thanks so much for stopping by - I always love to see you have been here and love to hear what you have to say!!
Jackie ")
Linking up to
Vintage Journey Challenge Blog-Dies&Distress #48
I am also linking up to
Simon Says Stamp Wednesday challenge-Emboss It! #33
Pretty sure I have both challenges covered! teehee
The Vintage Journey's Blog challenge for July is for using Dies and Distressing- in the Tim Holtz influence.
Since I dig Tim Holtz, I love distressing and I just got my first die! I thought I would play along!.
The main requirement of any of Vintage Journey's challenges is that your piece is Tim Holtz inspired.
Let's get to it...
For my substrate, I used the thin card that comes inside of the Tim Holtz Layering Stencils- I used this because it really had a nice pattern on it and if you know me, I love to re-use, recycle, upcycle, ect!
Other products used are listed below
To begin,I stamped vintage text across the card paper as well as added a few scrolls (which are now covered)
For the die, I cut the dragonfly from a patterned paper and then ran it through the embosser.
Next, I placed the right side of the cut paper over the stamped image and glued it in place.
(I really wish I taken in process photos!! Battery was dead! ARGH!)
(from the stamp- which is the scientific name for Dragonflies)
For the distressing with inks, I used the Broken China toward the center of my subjects and the Rusty Hinge and Vintage Photo toward the edges.
In the next photo,here,I added a bit of Glossy Accents to the wing's edges and also used it to adhere the "found wing" at the top of my substrate.
disclaimer-(No insects were hurt during this creation- the wing was found in Nature) ")
"The Journey Awakens the Soul" on the right hand bottom corner.
As you can see from my worktable, there is a pile of products I used on this piece. I will try and put them all in with links- if I missed something you would like to know about, please ask! ")
Broken China
Ripe Persimmon
Rusty Hinge
Vintage Photo
Peacock Feathers
Bundled Sage
Evergreen Bough
Mowed Lawn
Salty Ocean
Ranger/InkEssentials Embossing Pen~ Black
Tim Holtz "Journey"Stamp is from an older set which I do not know the name of- sorry"(
(to the best of my knowledge the above is now owned by Ranger-mine is pretty old! )
and
Stampers Anonymous Classics#1
Thanks so much for stopping by - I always love to see you have been here and love to hear what you have to say!!
Jackie ")
Linking up to
Vintage Journey Challenge Blog-Dies&Distress #48
I am also linking up to
Simon Says Stamp Wednesday challenge-Emboss It! #33
Pretty sure I have both challenges covered! teehee


