Tuesday, March 29, 2016

Bags & Tags with DecoArt & Gecko Galz


           Time for some color play with bags & tags!


The bag on the left is full of color with the bold and bright Americana Neon colors.
To the right,this bag, is lighter and springy using some Americana Multi Surface Satin mixed with Media Fluid Acrylic.

Brown paper Kraft bags I purchased awhile ago for a project,were used as my substrate.
To begin,the bags received a coat of white gesso.
For the first bag: 
After the gesso was dried,I stenciled the NEONS through a circle stencil using a pouncer.
Let dry
Repeat on reverse side of bag.

On the next second bag:
Mix Iris and White Titanium and stencil
Let Dry
Repeat on opposite side of bag.
Mix small amount of Iris and White Modeling Paste.
Scrape with palette knife through same stencil on one or both sides.
Allow to dry fully
                                           Add goodies!


Next are the tags I created by drawing egg shapes onto and cutting out of shipping tags.


Base coat each egg both side with white gesso
Apply chosen colors to each tag,allowing first side to dry and repeating on opposite. 
Flick and spatter some tags with contrasting colors.
Spritz & spray a few tags with Shimmer Misters.


On one or more eggs,
Apply White Crackle Paint,
When dry add Sand texture paste through stencil,let dry
Lightly paint acrylic paint and coat over entire egg,wiping back areas for interest.
When dry smudge Metallic Lustre' over raised areas and along the edges of eggs as well.
Coat backsides of all eggs with Gloss Medium


Now,time to doll up the egg tags using
 Gecko Galz collage sheets

After fancy cutting and tearing edges of my collage picks,I used Metallic Lustre around the edges,applied with my fingers.


A few embellishments added,bits of lace,torn papers as well as flowers.
Add some fancy ribbon or string for hanging.


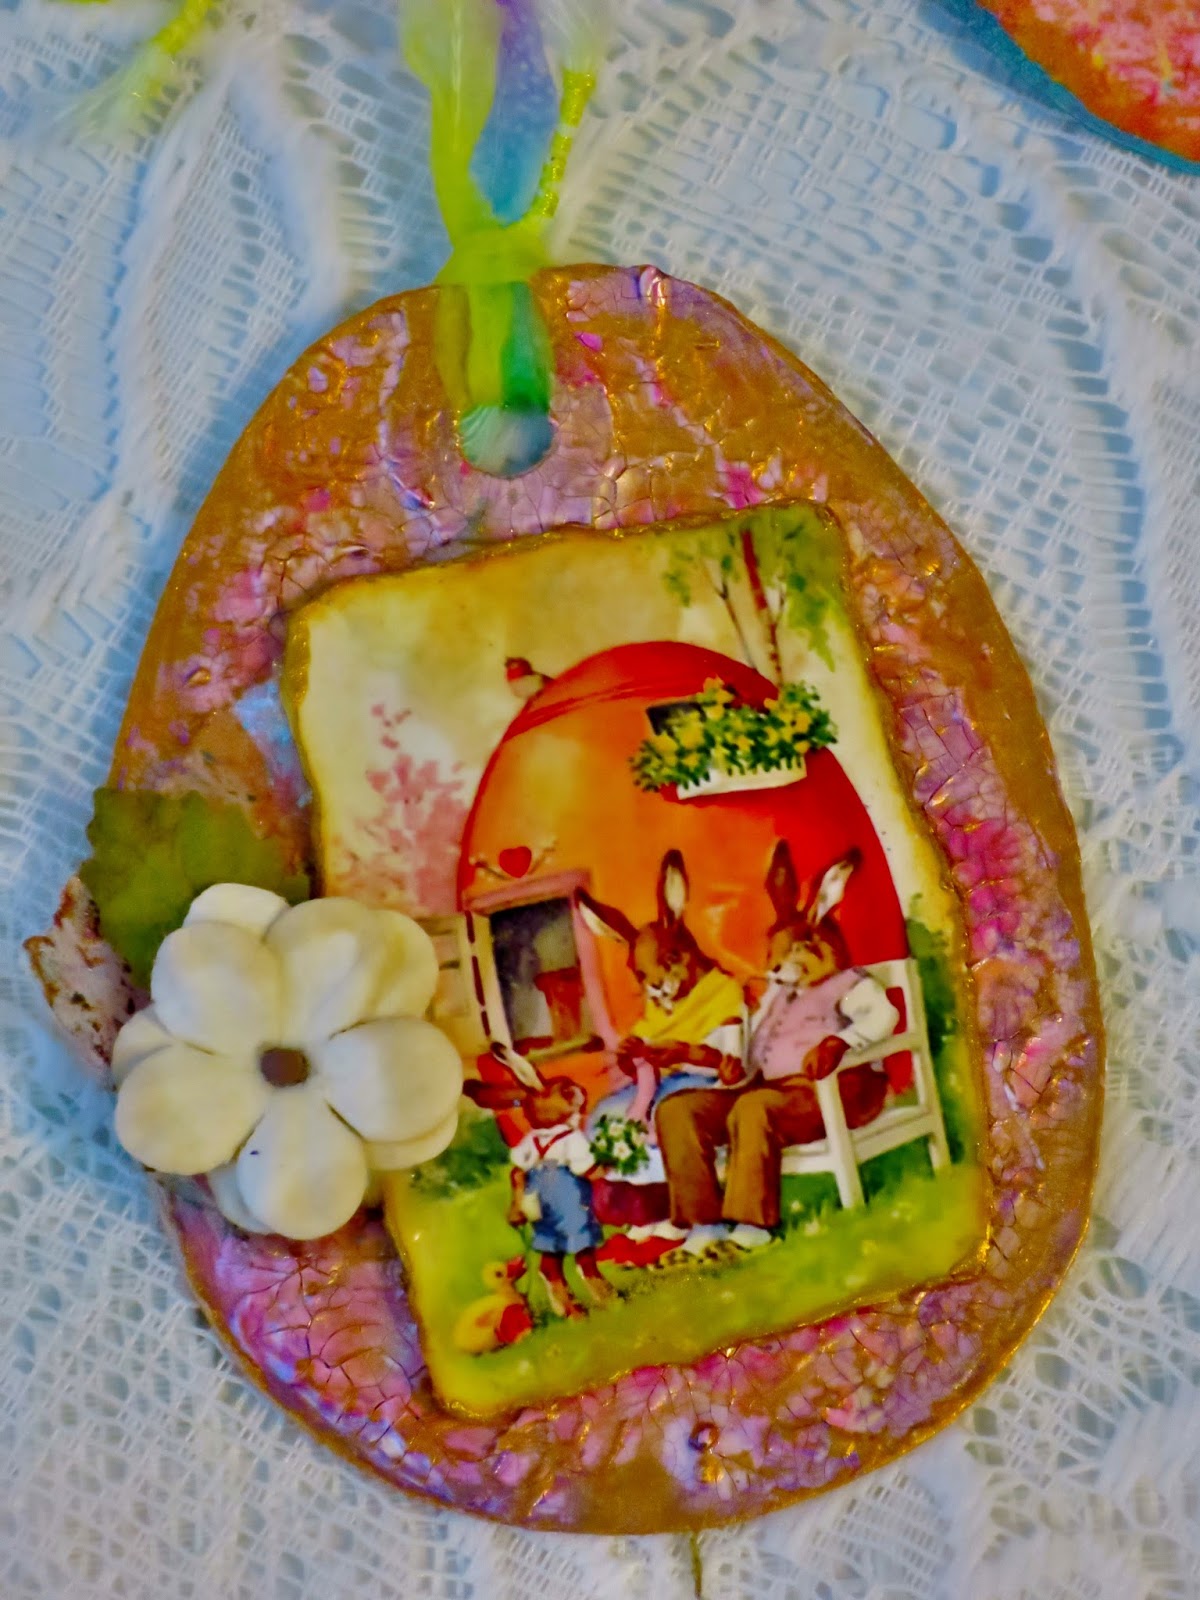
Final step was to add gloss to front of tags as well.


 And here is your Free blog stamp for the month of March! 
Thank you Gecko Galz!!


Products used:
GECKO GALZ collage Sheets~
Hip Hop Easter 1
Hip Hop Easter 2
My Little Chickadee

All DecoArt Paints&Mediums
DecoArt Media Gesso~White
DecoArt Americana NEONS~Sizzling Pink,Thermal Green,Scorching Yellow,Torrid Orange
American Multi-Surface Satins~School Bus,Iris,Lavender Fields,Canary,Poppy,Pink Tropics,Flamingo,Chartreuse
Americana Acrylics~Sea Breeze,Jack-O-Lantern,CitronGreen 
America Decor Chalky Finish~Innocence,Smitten 
DecoArt Shimmer Media Misters~White,Violet,Yellow,Turquoise
DecoArt Media Crackle Paint~White
DecoArt Media Texture Sand Paste
DecoArt Media Modeling Paste~White
DecoArt Media Fluid Acrylics~Titanium White
DecoArt Media Gloss Varnish

DecoArt Metallic Lustre'~Rose Gold,Orange Flicker,Gold Rush,Majestic Purple,Brilliant Turquoise

Brown Kraft paper bags
Manilla shipping tags 


Happy Easter Greetings! 
Thank you so much for your visit-it always makes my heart happy!
Namaste'
Jackie ")


Saturday, March 19, 2016

Playing dolls with Paper Artsy!


Paper Artsy is having an Art Doll challenge-how fun is that!
Forever I have loved to play with dolls. As a child,I made my own Barbie's clothing and then as an adult I joined a paperdoll group and we swapped handmade art/paper dolls monthly-we had such fun and I have such treasured dolls from that time!
When I saw this challenge,well naturally,I had to play along")

For my doll,"Truly North",I have no step outs,because my muse and I were having too much fun!


Two of the Paper Artsy Artists posts,in particular,inspired me in the creation of of my doll.
Both,the fairy art doll post by  Alison Hall
and also the post,"Carmen" by Gabrielle Price.
Click on the links to check out these wonderful art dolls as well as all the others over on the Paper Artsy blog.


  The stamps I used in the creation of Truly are by Lynne Perrella,available at Paper Artsy.
These are the two stamps sets I used:


Sorry I haven't been around as much as usual. My son Len is here visiting with us and,as you can imagine,I am getting in as much Mom time as possible đź’žđź’žđź’žđź’žđź’ž
Thanks so much for your visit~
Happy first day of Spring!
 Jackie ")


- See more at: http://blog.paperartsy.co.uk/2016/03/2016-5-carmen-by-gabrielle-price.html#sthash.YY80wzDN.dpuf

- See more at: http://blog.paperartsy.co.uk/2016/03/2016-5-carmen-by-gabrielle-price.html#sthash.YY80wzDN.dpuf

Monday, March 14, 2016

ART BARN POST!! Upcycling with DecoArt!


So,do you know all of those really cool barn doors you see on tv remodeling shows and on Pinterest? You know the vintage looking barn doors that are on sliders or rails that people are putting up in their homes?
(the ones that cost over $200.00 just for the hardware?)
Well,hubby and I put our creative minds together and made our own for the Art Barn!
Riley says,you know what would be cool? How about a sliding barn door hanging off the loft?
 I was-yup,yup-I'm all for it!
To be honest,we did go to Lowe's and and a few rehab stores to look first,and well,sticker shock sent us flying back home to check our stash!
Last fall on my way home from the hairdresser,I spied a beautiful 10 foot 6 panel solid wood vintage door on the curb,sadly destined for trash pickup.I made time getting home,grabbed Riley and the truck and said let's go!
 Good thing too,because that became the base of our Art Barn sliding door!
(btw,the trash haulers were just down the street when we got there-in the nic of time!)
Warning:Totally photo heavy post! so make sure your cup is full!
 The first thing we did was to measure and cut out the space for the window we were to use.
The original color was a pale yellow on one side and even paler on the other.
piece cut out for window
 Once the center was cut out and window nailed into place, my creative and resourceful husband cut strips from the removed piece to use as trim around the window.

  I had four of these windows I had bought well over 8 years ago from Craig's list
(before used materials became over-priced expensive)We used another of the windows on our porch renovation  and sold the 2 broken windows at a yard sale.
Next,a bit of caulking and little more scraping,leaving some of the found original Olive Green paint showing as well.

Ahhh, my favorite part....
Brushed on a liberal layer of Weathered Wood Crackle Medium and let dry over night.
In the morning using Americana Snow White acrylic,I thinned it down with a bit of water and brushed it over the door,some places heavier than others.
if you look closely you can see the Weathered Wood already started to do it's business.


Let the crackling begin!


Once the crackling had dried,I used DecoArt Chalky Finish totally thinned down with water and brushed over the door wiping back areas as I went...here are the yummy results
(shows much darker in the close ups,but the actual seen in full length door photos)


 Is that crackle gorgeous or what?? 
Looks pretty well worn to me!
All that was left to do now was add the hardware.
The hardware,we have no idea what they are; found them at a barn sale and had to have them! 
If you have a clue, please share!
 
 
The rollers came off our the doors that were originally on our barn when we bought the place


sorry for the blurr


 For the doorplate I used a piece of Spellbinders Media Mixage and ran it through my embosser using an Em-bossing plate. 
Next I gently brushed on and wiped off DecoArt Blackboard Paint
 added a piece of porcelian I found dump digging when I was a kid
 a new old stock doorknob and plate,a rusty slider, a bit of brass decor and a marble in the middle!
 

So there you have it...
 We now have a $300-400(at least) "new old" barn door!
Our cost-all supplies on hand already.
Thanks so much for your visit and I hope I have inspired you today! Go Green! 


Products used:
DecoArt WeatheredWood Crackle Medium
DecoArt Americana~Snow(Titanium)White Acrylic
DecoArt Chalkboard Paint
DecoArt Chalky Finish~Rustic 

Paintable Acrylic caulk
Spellbinders~EmBossing Plate~Persian Splendor
Spellbinders Media Mixage Foil~Copper color
embossing machine
brad nails
hammer 
scraper
found vintage items 


Thank you for your visit!
Jackie ")