Wednesday, December 24, 2014

Greetings from my home to yours

Merry Christmas eve to all of you here in the US and Merry Christmas to those of you who already at Christmas day in other parts of the world!!

Today I would just like to say THANK YOU!!  
To all of my friends,creatives and kindred souls who I chat with regularly on the net, who visit my blog,and encourage and support me! and those who share in art communities with me-all whom I am eternally grateful to have met! 
Thank you all for being a part of my world and allowing me to be part of yours!
I wish you all the Merriest of Christmas tidings & blessing in the New Year for the best of health and all good things!


and now I leave you with a picture tour of my home this season...

 The real elves..aka elf on  a shelf before they became a fashion statement! teehee


 Vintage Silver Pom Pom tree...


 My sister Julie and I at the Dey's (Dey Brother's) store downtown Syracuse circa 1960 something ")

and now to my little Christmas village of Pinecone Elves and deer...
 Mom & Dad had a driftwood decoration covered with some moss and about 6 of these elves and 4 deer that they put up on the buffet in the dining room every Christmas time. Every day the positioning was different as one of us girls (there are five of us) would go change their places as we thought our design was the best! heehee
Well, as you can see, I love those elves and could not have just 6!


My son Len made this angel in kindergarten and my son Lindsey made the Mary & Joseph plaque-even though their decorations may be a bit time worn- they come out every year in special places of honor!!  Wonder where they got their creativeness from?! heehee


I would like to say this is how beautiful our snow is outside...but this is actually last week...now it is pouring rain and a big mud mess- so I will leave you with these pictures of a winter wonderland!

My love to you all~

Jackie ")

Tuesday, December 23, 2014

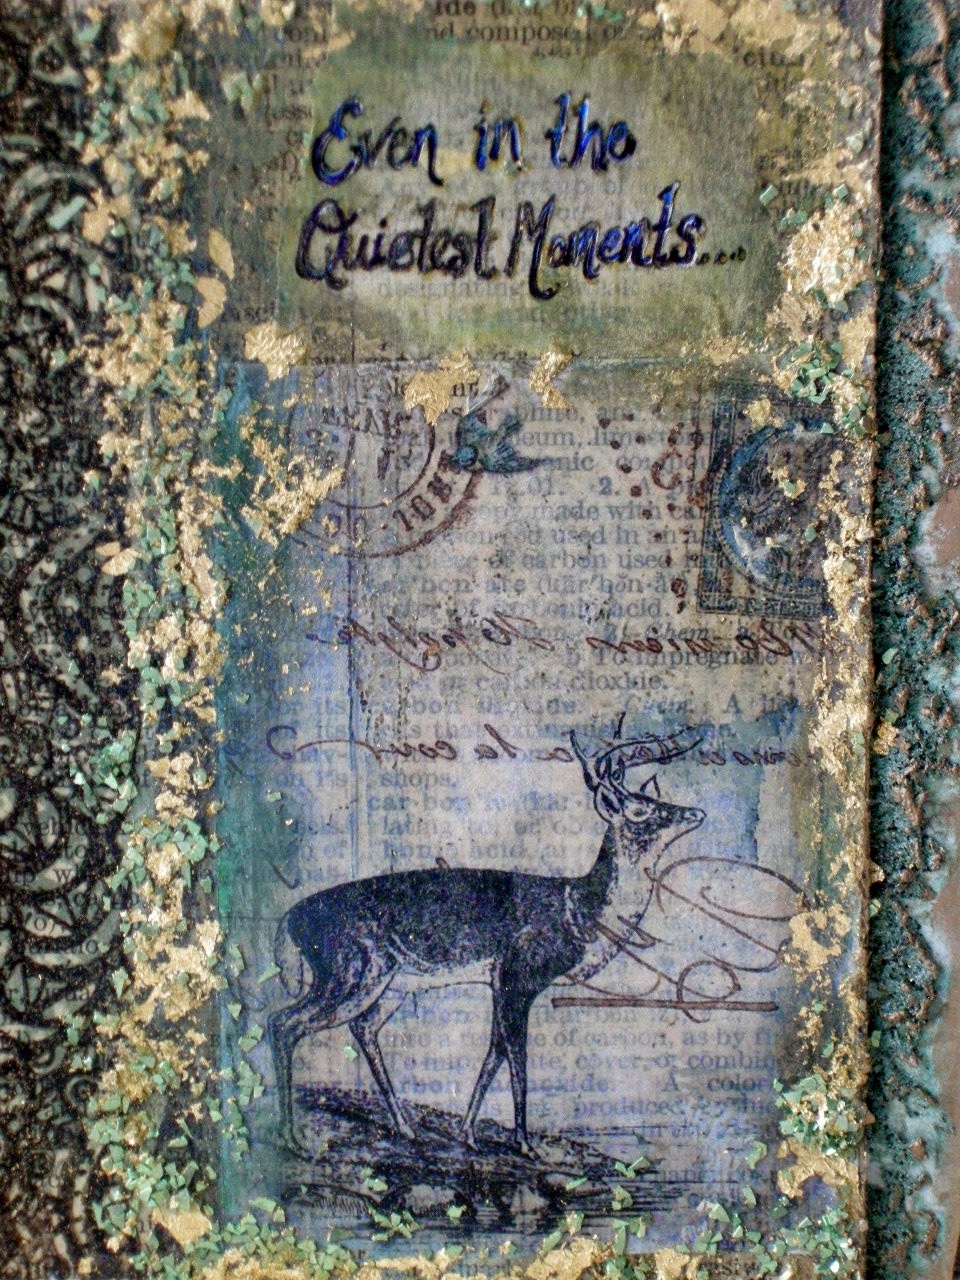
Even in the quietest moments...


 Just a quick tale on the new mixed media piece I made for my Team Member debut on the  Altered Pages Design team


As you can see a piece of packing never goes to waste in my studio!! 
I edged the backing with DecoArt sand paste and let it dry.
No in between pictures as I really have been up to my fingers in projects all over!!
But, what I did next was to cut a piece of cardstock to fit in the center of the above board.


After covering my cardstock with vintage dictionary pages and sealing with matte gel...
I did some fancy stamping with my JFF -StampTangle Border3-Rubber Stamp, whom Altered Pages is partnering with in December. 
Then I  transferred an image of the deer- using DecoArt Image Transfer medium. I also added a torn piece of tissue paper with my wording at the top.

The next steps were as follows;
 I used a few Niji oil pastels to blend some color into and around the center piece
 Sprinkled Fresh Green Crushed Glass Glitter around the center picture and when that was dry,
 I used Gold Leaf Gilt Flakes atop of the glitter. 
Finally, I used my fingers to apply German Silver Gilders Paste to the dried sand texture.
I then attached this finished piece to the substrate using double sided tape
 All of these products can be found at AlteredPages.com
Stayed tuned- My first official post is Thursday~January 1st 2015!!


Thanks so much for stopping~ makes my heart sing!  Jackie ")

The big reveal! A new Design Team member!

Monday, December 22, 2014

Meet Altered Pages New Design Team Member!

AlteredPages .com is thrilled to welcome
 
Jackie P Neal

on the Altered Pages Design Team!  

We feel like we already know Jackie as she has been  member of the Altered Pages Group on Facebook for quite sometime! 


Jackie P Neal here and I am over the moon excited that Jean has invited me to be part of AlteredPages design team!

I am a self taught mixed media artist, who loves all things art! My favorite mediums to create in,well, everything! I do however,have a fondness to create with textures and found treasures. Found treasures? Yes, I am a hoarder and so is my husband.teehee  We live in a small town in Upstate, New York called Wolcott. Having rencently moved here, we found the perfect place with lots of land and a huge pole barn. The land for growing our veggies and the pole barn to store our hoard of vintage treasures -maybe even to sell one day! 

Recently,I worked at Artistcellar on their design team and am now part of DecoArt's Blogger's Program.

My family is my husband who is my partner in collecting and creativity and our Golden Retriever, who loves to play soccer!  Between us we have, my two grown sons and a new daughter-in -law, and his son & wife and 4 rambunctious boys and his daughter with her son & daughter. Whenever the grankiddos come to stay- we always "do art" as they say!

Today we have a beautiful mixed media project create by Jackie!!!   


Visit Jackie at: www.creatingwithoutcrayons-jackiepneal.com


This month the Altered Pages Design Team is Partnering with the Just for Fun Stamps Design Team. We hope you have been following along this month,  we have been sharing projects by both teams.

Tuesday, December 9, 2014

Wintery Sleigh Ride!

Another recycled item to share with you today!

  I  do hope you have your cuppa full, because this is a  l o n g- pictured post with lots of yummy texture and colors- featuring DecoArt products.

                       Sit back and enjoy!  
 
 So,if you don't know me yet, you'll find, I'm not big on cutsie, not at all - so,when I found this sleigh at a garage sale - I knew that a heavy coat of gesso and some paint would work wonders! teeheehee
First thing was to remove the hardware and give the overall piece a light sanding


 The metal pieces received a spray coat of a beautiful brushed silver paint.
The sleigh carriage received a coat of gesso in and out.
 And now on to my colors.
  I pulled out all of my blues and whites,off white included, shimmer and matte as I was not yet sure of my final choice
 I decided on a mixed palette of  
Spa Blue,Sea Glass,Light Buttermilk and a touch Cobalt Teal Hue.
 My next step was for the layering- 
Dollops of White Wash, Titanium White,White Pearl, and Turquoise Interference and a makeup sponge...
I mix my colors as I pounce so the shades are intermingled.


 And now, pouncing color through Tim Holtz's HollyBough stencil onto the carriage.
 Next using my Shimmering Silver, I pounced random stars through a stencil the same as above.

 For my textured layer, I used the mix of leftover paints and a bit more of Shimmering Silver together with light modeling paste.
 This is applied through the stencil with my palette knife,covering both sides and the front & back of carriage.
I let this dry overnight and then sanded down the peaks and sharp edges.


On to my snowflakes- well this was a cluster!
 I mixed colors and painted each and every Chipboard Snowflake I could find!

Then I decided I did not like the way they looked- 
just not enough pop!
So I decided to glitter them!
Here's a short story about embossing your glitter-
I watched a tutorial on Youtube about embossing your glitter so it would stay in place and not flake off! I thought,hey!way cool idea-I'm gonna do this!
Well, after burning my fingers 2 or 3 times and in the throws of burning my fingers, quickly moving the heat tool away, blowing it into the dish of fine glitter.....
What a mess!!! I had enough of this-real quick! heeheehee  So glad I wasn't recording this! ")
   
So I finished by gluing and adding glitter to my snowflakes and left them to dry while I continued on with my layering!
Next layer was a light application of Ranger Archival Ink ~Forget-Me-Not around the edges of the carriage body-giving it a gentle distressed look


Using my fingers, I gently brushed over the modeling paste areas a light coat of InkaGold~Haematite (metallic dark grey)

Next layer was a mixed coat of DecoArt Glazing Medium along with DecoArt Media~Turquoise Interference
over the entire carriage body.


 When all was dry I applied one final layer of Americana DuraClear Gloss Varnish.

 My last steps were to add my snowflakes using E6000 glue and reattach the sleighs and handle.


          Santa in his new sleigh in front
               of the Christmas tree!


 And finally...Chum is just itching to get ahold of Momma's vintage Santa...

 and he is quite annoyed when I tell him - No way!

Thanks so much for joining me and I really hope to have inspired you today!
Maybe you'll find some old and tired treasure that could use a lift and upcycle it !
Jackie ")